Alright, folks, strap in and hold onto your four-leaf clovers, because we’re about to merge the whimsy of St. Patrick’s Day with the bouncy charm of childhood in a DIY extravaganza. What do you get when you cross a leprechaun’s luck with a wee bit of physics? A DIY bouncy ball that’s greener than the hills of Ireland and more spirited than a jig at midnight. Not only are these homemade globes of joy as bouncy as a leprechaun on a trampoline, but creating one also can also teach you a thing or two about elasticity, material science, and the undeniable truth that glitter makes everything better.
Now, before you rush off frantically searching for your pot of gold (or, let’s be real, your stash of craft supplies), keep your socks on because we’re about to lay down the golden path. Up next, we’re diving into the emerald forest of bouncy ball creation, where the rubber meets the (sham)rock. We’ll be prancing through a step-by-step guide sprinkled with tips to make your bouncy ball the envy of the neighborhood. It’s going to be like finding the secret map to the end of the rainbow, and the best part? You don’t have to share the loot with any pesky leprechauns. Keep your eyes peeled for sneaky tricks to make your bouncy ball not only St. Patrick’s day themed but also the life of your own personal parade.
Key points I covered in this post
1. The article provides a step-by-step guide on how to create a DIY bouncy ball for St. Patrick’s Day, using simple, easily obtainable ingredients such as borax, cornstarch, glue, and food coloring. This hands-on activity allows for a fun and creative way to engage in the holiday’s festivity and can serve as an educational project for children, emphasizing the joy of making toys from scratch.
2. The process involves mixing the glue with food coloring, preferably green to fit the St. Patrick’s Day theme, followed by adding a borax and cornstarch mixture. This combination creates a chemical reaction that results in a malleable substance. The importance of precise measurements is highlighted to ensure the proper consistency and quality of the bouncy ball.
3. Safety tips are included for handling materials, such as wearing gloves when mixing and supervising young children to avoid ingestion of non-edible ingredients. The article emphasizes the need for adult supervision throughout the project, thus ensuring a fun and safe experience for all participants.
4. The article suggests customizing the bouncy balls with glitter, additional colors, or embedding small shamrock confetti to add a personalized touch to the craft. These custom options are presented as an opportunity to ignite creativity and personal expression, making the activity equally enjoyable for adults and children.
5. Finally, the article provides insights on the science behind the bouncy ball creation, explaining how the cross-linking of polymers in the glue by the borax creates an elastic material. This explanation provides an additional educational aspect to the craft, potentially sparking a deeper interest in science and chemistry for the participants involved.
**How Do You Make a Bouncy Ball for St. Patrick’s Day?**
Creating a bouncy ball for St. Patrick’s Day involves combining borax, cornstarch, glue, and water with a dash of festive food coloring or glitter to capture the holiday spirit. The chemical reaction between the borax and glue forms a polymer, which gives the ball its elasticity. For a St. Patrick’s Day theme, utilizing green food coloring and gold glitter will add a special and festive touch to the project.
Materials Needed for Bouncy Balls
To embark on crafting your own St. Patrick’s Day bouncy balls, gather the following supplies:
- Borax (Sodium tetraborate)
- White or clear school glue (PVA)
- Warm water
- Cornstarch
- Green food coloring
- Gold glitter (optional)
- Measuring spoons
- Two small mixing bowls
- A spoon or craft stick for stirring
Step-by-Step Creation Process
Begin by mixing 1/2 teaspoon of borax into 2 tablespoons of warm water in the first bowl until fully dissolved. In the second bowl, blend 1 tablespoon of glue, 1/2 teaspoon of the water and borax mixture, and 1 tablespoon of cornstarch. If you would like to add color, insert several drops of green food coloring into the mixture before adding the cornstarch. For an extra touch of St. Patrick’s Day celebration, sprinkle in some gold glitter.
Troubleshooting Your Bouncy Ball
Sometimes, the mixture might be too sticky or too dry, affecting the bounciness of the final product. If the mixture is too wet, add a bit more cornstarch. Conversely, if it’s too dry, you can add a little more of the water and borax solution. The perfect consistency will feel solid yet pliable.
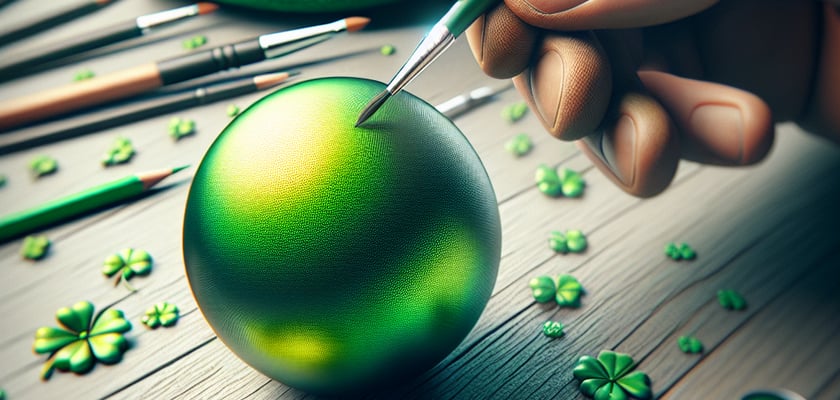
Customizing Your Bouncy Ball
Experiment with varying amounts of food coloring for a range of green shades. You can also incorporate clover-shaped confetti or other St. Patrick’s themed items inside the ball as you mold it. Keep in mind that adding too many add-ins might affect the bouncing ability.
Molding and Curing the Bouncy Ball
Once thoroughly mixed, roll the sticky substance between your hands to form a spherical shape. If the mixture is too tacky, let it sit for a minute or lightly dust your hands with cornstarch. It’s crucial to quickly shape the ball since the mixture will begin to harden. After shaping, allow the ball to set for about 10-20 minutes to achieve the best bounce.
Preservation and Usage Tips
To maintain the bouncy ball’s elasticity, store it in an airtight container when not in use. Avoid exposure to extreme temperatures as it can cause the ball to lose its shape or firmness.
How Can You Ensure Your DIY Bouncy Ball Lasts?
- Avoid exposing the bouncy ball to direct sunlight for extended periods, which can degrade the material.
- Keep the bouncy ball away from water or moist environments as it could dissolve the borax and glue bond.
- Handle the bouncy ball gently and avoid squeezing it too hard to prevent distortions in shape.
- Use within a reasonable amount of time, as over time, the bouncy ball may lose its elasticity.
- If not using the ball, consider remaking it every few weeks to ensure optimal bounce and preserve the festivity.
What materials are needed to make a DIY bouncy ball for St. Patrick’s Day?
To create a DIY St. Patrick’s Day bouncy ball, you will need borax, cornstarch, warm water, white glue, food coloring (preferably in shades of green for the holiday theme), and a small mixing bowl or cup. Gloves and protective eyewear are also recommended to ensure safety during the crafting process.
Can the bouncy balls be customized for St. Patrick’s Day?
Yes, the bouncy balls can easily be customized for St. Patrick’s Day. You can incorporate green food coloring, add glitter or shamrock-shaped confetti into the mix before forming the balls, or even embed small St. Patrick’s themed trinkets inside the bouncy ball for a festive surprise.
How long does it take for the DIY bouncy balls to dry and become usable?
The drying time for DIY bouncy balls can vary, but typically it takes about 24 to 48 hours for the balls to set completely. It is important to allow adequate time for drying to ensure they reach their optimal bounciness and durability.
Are DIY bouncy balls safe for children to make and play with?
DIY bouncy balls are generally safe for children to make and play with under adult supervision. It is crucial to ensure that children do not ingest any materials and that they wash their hands after handling the materials. Always follow the safety guidelines of the materials being used.
What are some creative ways to use the bouncy balls for St. Patrick’s Day festivities?
Creative ways to use St. Patrick’s Day-themed bouncy balls include using them in a themed treasure hunt, as party favors, or in a game where participants try to bounce the balls into pots resembling pots of gold. They can also serve as festive decorations or can be incorporated into crafts and activities celebrating the holiday.
Final Thoughts
Celebrating St. Patrick’s Day with a DIY bouncy ball project is not only a fun and engaging activity but also a fantastic way to channel creative energy into something tangible and playful. The process of making these bouncy balls allows individuals, families, and friends to bond over a shared crafty experience, while also embracing the festive spirit of the holiday. By adding your own unique touches like green coloration, shamrock shapes, or glitter, each ball becomes a personalized token of the holiday’s joy and luck.
Moreover, the customizability of the DIY bouncy balls means they can be adapted to suit various age groups and preferences, making the activity inclusive and enjoyable for everyone. So, whether you’re organizing a classroom activity, planning a family craft day, or just looking for a singular and interactive way to celebrate St. Patrick’s Day, creating DIY bouncy balls is an admirable choice that promises a burst of green-themed amusement and laughter, truly capturing the essence of the holiday’s charm.