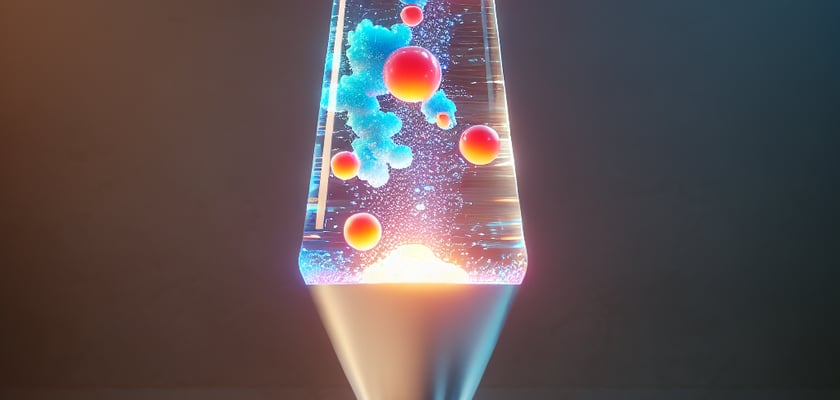
Ever gazed at a lava lamp and pondered the groovy magic happening inside that glittery column of psychedelic bliss? Well, strap on your science goggles, my friend, because we’re about to dive headfirst into the bubbling world of lava lamp science experiments! These mesmerizing blobs of wax aren’t just relics from your Aunt Gertrude’s attic; they actually encapsulate some rad principles of chemistry and physics. With an enchanting dance powered by density differences and the good ol’ laws of thermodynamics, lava lamps are like mini disco balls for atoms, teaching us about buoyancy, heat transfer, and even the molecular hustle.
Now, calm your quivering anticipatory molecules, because we’re just shimmering on the surface! Stick around for the key takeaways section, where we’ll reveal how you can cook up your very own homebrew of a lava lamp experiment. Prepare to drop some icy cold water on top of that oil-based science salad, and watch as the lava-like magic unfolds. We’re not talking about concocting Frankenstein’s monster here, but you will unleash a colorful, blobtastic reaction that will have you oooh-ing, aaah-ing, and possibly reaching for those old bell bottoms. So, don your most flamboyant socks, and let’s get ready to light the metaphorical Bunsen burner!
Key points I covered in this post
1. A lava lamp science experiment can demonstrate principles of density, solubility, and immiscibility by showing how oil and water, which do not mix, create distinct layers due to their different densities with water being denser than oil.
2. The addition of food coloring to the water provides a visual contrast that makes it easier to observe the movement of bubbles; the colored water is denser than the oil and therefore sinks, but when the effervescent tablet is added, it creates carbon dioxide gas which is less dense than both liquids and carries some colored water with it to the top in bubbles.
3. The descent of the bubbles back to the bottom once the gas escapes showcases how substances separate out according to their densities, with the water returning to the lower layer while the less dense oil remains on top, and the carbon dioxide gas dispersing into the air.
4. Conducting the experiment requires household items: a transparent bottle or container, vegetable oil, water, food coloring, and effervescent tablets, which allows for an accessible and simple implementation in various settings, such as classrooms or at home.
5. The experiment serves as an engaging educational tool that can spark curiosity in scientific principles among learners of various ages, while also providing a visually appealing spectacle that resembles the mesmerizing motion inside a traditional lava lamp.
How Does a Lava Lamp Science Experiment Work?
The Lava Lamp Science Experiment operates on the principle of density and immiscibility, demonstrating how substances with different densities interact without mixing. By combining water with oil, a clear separation is visible because oil is less dense and hydrophobic, causing it to float on water. When an effervescent tablet, like Alka-Seltzer, is introduced into the liquid mixture, it reacts with the water to create bubbles of carbon dioxide gas. These bubbles attach to the colored water globules trapped in the oil and carry them to the top. Once the gas escapes, the density of the water increases again, and it sinks back down, creating a mesmerizing effect reminiscent of a commercial lava lamp.
Materials Required for a DIY Lava Lamp
To set up your own lava lamp experiment, you’ll need several household items:
- Clear plastic bottle or a glass container
- Water
- Vegetable oil or baby oil
- Food coloring of your choice
- Alka-Seltzer tablets or similar effervescent tablets
- Flashlight or other light source (optional, for illumination)
Setting Up Your Lava Lamp
Follow these steps to assemble your lava lamp:
- Fill the container about one-quarter full with water.
- Add several drops of food coloring until you achieve the desired color intensity.
- Slowly pour the oil into the container until it is almost full, leaving some space to avoid overflowing.
- Wait a few minutes for the oil and water layers to separate completely.
- Break an Alka-Seltzer tablet into pieces and drop them into the container to start the reaction and create the lava effect.
- Place your lava lamp in front of a light source to enhance the visual effect.
Understanding the Reaction
Diving deeper into the chemical reaction, when the Alka-Seltzer tablet dissolves in water, it creates a chemical reaction that produces carbon dioxide gas. In the closed environment of the bottle, pressure builds up from the carbon dioxide gas. This process is responsible for temporarily bonding the colored water to the gas, allowing it to rise through the oil. When the gas is released at the top, we see the colored droplets fall back down, only to rise again with another bubble of gas. This creates a cycle that replicates the movement inside an actual lava lamp.
Troubleshooting Common Issues
There might be a few challenges you may encounter during the experiment:
- If the oil and water don’t separate, ensure there are no detergents or impurities in the container or the liquids.
- When the lava effect isn’t working, make sure there is a sufficient amount of effervescent tablets to create the gas needed for the reaction.
- If the effect is too subtle, adjust the lighting or add more food coloring for better visibility.
Safety Considerations and Clean Up
Even though household items are used in this experiment, it’s important to be cautious:
- Keep the experiment out of reach of small children and pets as the materials used can be ingested and may pose a choking hazard.
- Avoid eye contact with the effervescent tablets’ residue, as it may cause irritation.
- Once the experiment is over, dispose of the mixture properly. Do not pour oil down the drain as it may cause blockages. Follow local guidelines for disposal.
Extending the Experiment
For those interested in further exploration, consider experimenting with:
- Varying the amounts of water and oil to study how the proportions affect the reaction.
- Using different types of oil to observe any variations in the experiment results.
- Altering the temperature of the water to see if it influences the behavior of the bubbles.
What Are Some Tips for a Successful Lava Lamp Science Experiment?
- Ensuring the temperature of the water is room temperature to provide ideal conditions for the reaction.
- Handling all substances with care to prevent mixtures that could affect the experiment’s outcome.
- Illuminate the lava lamp against a dark background for an impressive display.
- Using the experiment as a learning opportunity to discuss the concepts of density, immiscibility, solubility, and chemical reactions.
What causes the blobs in a lava lamp to move?
The blobs in a lava lamp move due to the changes in density and temperature. When the wax heats up at the bottom of the lamp, it expands and becomes less dense than the liquid surrounding it, causing it to rise. Once it reaches the top and cools down, it contracts and becomes denser, sinking back to the bottom to reheat and rise again. This cycle creates the mesmerizing motion that is characteristic of a lava lamp.
Can I make a lava lamp at home with common household items?
Yes, you can create a simple homemade lava lamp using ingredients like water, vegetable oil, food coloring, and effervescent tablets (such as Alka-Seltzer). By combining these substances in the right order, you can mimic the density and temperature changes seen in a commercial lava lamp.
Is it safe to leave a homemade lava lamp unattended?
No, it’s generally not safe to leave a homemade lava lamp unattended. Unlike commercial lava lamps, which are designed with safety in mind, DIY lava lamps may lack certain safety features. Always supervise the lava lamp while it’s in operation and keep it away from flammable materials.
How long will the reaction in a DIY lava lamp last?
The duration of the reaction in a DIY lava lamp depends on the size of the effervescent tablet and the quantities of the other ingredients used. Typically, the reaction can last from several minutes up to half an hour. Adding more tablets can prolong the reaction, but for continuous effects, commercial lava lamps are more reliable.
Can I reuse the same mixture for multiple experiments?
While you can reuse the oil and water mixture, the effervescent tablets’ reaction is a one-time process. Once the tablets are fully dissolved and the reaction has ceased, you will need to add new tablets to restart the experiment. Over time, you might also need to replace the water if it becomes cloudy or if the mixture becomes contaminated.
Final Thoughts
The lava lamp science experiment is not only a fun and colorful way to engage with science concepts like density, solubility, and reactions, but it also provides a creative outlet for learning and exploration. While homemade versions may not last as long as their commercial counterparts, they offer an accessible and hands-on experience that can be educational for children and adults alike.
Moreover, conducting a lava lamp experiment can be a stepping stone into broader scientific inquiries and could inspire future scientists. It’s crucial, however, to place emphasis on safety and supervision, especially when experimenting at home. With the right precautions, the lava lamp experiment can be both a joyful and illuminating experience, filled with opportunities for discovery and learning.